


 Just in case you haven't found enough ways to squander your time on the internet, I've found a site to help you out and it's called Tagxedo. Tagxedo helps you create word clouds from a URL, twitter feed, theme, etc. But what makes this word cloud site stand out is that you can make the words into any image you want. You can even change the font, font direction, color, and more. To test out the site I uploaded one of my profile pictures and created a word cloud based on the Zakka Life URL. It was fairly easy to make and fun to do. Check it out and tell me what you think.
Tuesday, January 31, 2012
Word Play
Just in case you haven't found enough ways to squander your time on the internet, I've found a site to help you out and it's called Tagxedo. Tagxedo helps you create word clouds from a URL, twitter feed, theme, etc. But what makes this word cloud site stand out is that you can make the words into any image you want. You can even change the font, font direction, color, and more. To test out the site I uploaded one of my profile pictures and created a word cloud based on the Zakka Life URL. It was fairly easy to make and fun to do. Check it out and tell me what you think.
Sunday, January 29, 2012

Friday, January 27, 2012
Valentine Cards with Heart Necklaces
 Earlier this week I shared about the origami lucky hearts I was making. Well, my daughter and I liked them so much that we decided to make them into necklaces for Valentine's Day cards. While I was making them, I realized some of you may wonder why I even go through all this trouble. You may even be asking: Won't most of those go into the trash? Do the kids even appreciate them? Here are my thoughts. . .
First, I love creating and making things. I love the design process from beginning to end. I can tell you right now if this wasn't my passion, I would not do this. Instead, I would probably just buy the cards. Also, my kids like and appreciate the personalized cards.
The second reason I do this stems back to my own childhood. I absolutely adored Valentine's Day as a child. I can remember being so excited to empty my haul of cards onto my desk (those days we got to look at our cards at school). I would pull out each card an examine it thoroughly. In particular, if it was from a boy I liked, I paid extra attention to the words: did it say friend? valentine? were there any xoxo's on it? That was half the fun but what I liked most were the handmade cards. I was that child. I can remember one of the kids in my fifth grade class had an extra crafty mother. She always made fun cards. I can recall one that had a unique opening with jokes inside. I also remember a card of a heart eating heart. Now that I'm thinking about it, that's kind of strange. Nonetheless, I remembered, liked, and appreciated what she made. So, I can only believe that there is some child besides my own that will appreciate what I make. I'll probably never get as much as a thank you and I don't care. To me it's a small way of making the day fun and special.
 Here are the templates for the valentine cards. The squares are designed to measure 3.3" x 3.5". To make your own, click on the template, right click, copy, paste and print.
Click here for heart folding video. To make the necklace just thread it with string.
 To attach the necklaces to the cards, I punched two holes at the top and cut a slit from the edge of the card to the hole. This way I could just slide the string into the hole.
 So the necklaces don't turn into a tangled mess, I taped them in the back. I used washi tape because it's low tack and will be easy for the kids to peel off.
Thursday, January 26, 2012
At First Site: Mariela Dias
 I'm back again with my new series At First Site. Once a month I'll be sharing about sites/artists that inspire me. I hope in the process you'll discover something new and get inspired too.
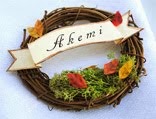
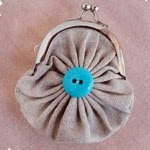
Inspiring me this month is designer Mariela Dias who writes the blog Mariela Dias. Mariela designs, makes and sells felt accessories. Her bold colors and creative use with felt instantly attracted my attention. Usually when I think of felt crafts, I picture felt food and softies but Mariela is creating so much more with the medium.

How and when did you start working with felt?
I studied Design at the University of Aveiro and during my training I did some work on design/crafts. From that moment, I understood that the design and craftsmanship could result in a perfect marriage. I started working with felt six years ago, first as a secondary activity. Four years ago it became a full time job.
My work aims to recreate the essence of Portuguese craftsmanship: based on floral and geometric motifs present in the pottery and embroidery ("lencos dos namorados") and in general, Portuguese traditional crafts and feminine details that coexist in harmony with today's trends.
 Do you sew all your pieces?
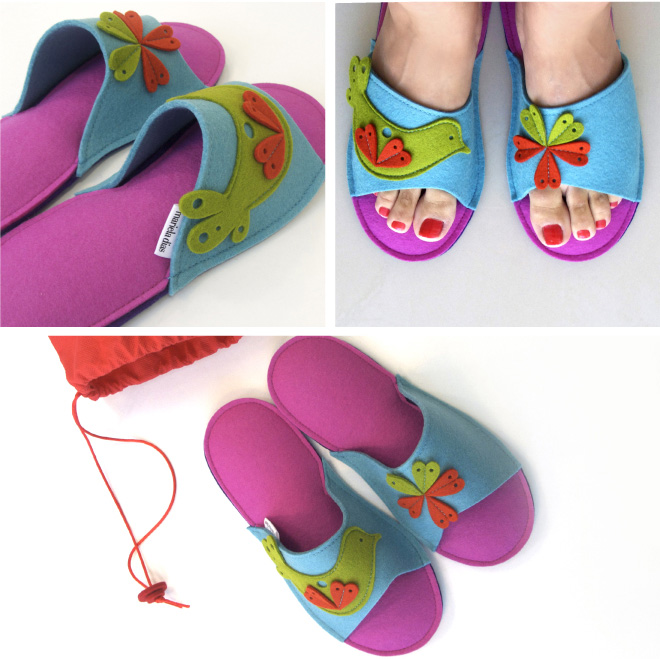
It's all done by me. To make a bag, for example, I start by drawing and then the shape is all set. I make the bag template out of cardboard. Using scissors or a scalpel, I cut the felt in accordance with the drawing. Then I baste the pieces and finish the sewing bag.
What inspires your artwork?
I find inspiration in traditional Portuguese handicraft but also I do daily walks around town.
 If you have a minute or two, stop by her site to see what she's creating . The photos above are just a small sample of her work.
Tuesday, January 24, 2012
Hello!Lucky Printable Valentine Cards
 Hello!Lucky is offering free printable valentine cards for their fans. There's a total of four designs to choose from which include a banana, cuckoo clock, monkey and owl. Stop by Hello!Lucky to download the cards. And if you have the time, check out their stationary. The letterpress cards are just delightful.
via Craft
Sunday, January 22, 2012
Origami Lucky Hearts
 You've heard of lucky stars but have you heard of lucky hearts? They're constructed similar to lucky stars with only a few adjustments. They're also just as quick to make. Fill up a jar for a Valentine's Day gift or string one on thread to make a necklace. Click here for the video tutorial.
Heart Necklace
If you want the hearts to be sturdier, cover them in a coat of decoupage glaze. Besides making them sturdier, the decoupage will give them a nice shine.
Thursday, January 19, 2012
Featured in Disney FamilyFun Magazine
 A while back FamilyFun Magazine requested to use my Superhero Lollipop Valentine idea. It has been a long wait but the February issue is finally out featuring the project. Also featured in the magazine are some cute ideas from bloggers Design Mom and Dollhouse Bake Shoppe. If you get a chance, check out the magazine. It's filled with lots of cute ideas for Valentine crafts. I particularly have my eye on the chocolate kiss ring project.
Photo of Superhero Valentine in FamilyFun Magazine
Sunday, January 15, 2012
Minifigure Valentines
 Over the weekend I began the process of designing and assembling the kids valentine cards. From past experience, I've realized it's never too early to start. The last thing you want to find yourself doing is constructing 50+ valentine cards in the wee hours of the night while watching reality TV. Been there, done that, don't want to do it again.
This year I decided to go with a Lego theme since that's my son's current obsession. The Lego guys are supposed to be a minifigure version of my son.
 My design was inspired by the MUJI Lego kits. I always loved the concept of combining Legos and paper. It's only now that I got a chance to play with the combination. To make the paper minifigures stand, they are wedged between two Lego blocks. I purchased the blocks at the Lego store where you can pick and choose which blocks you want. If anyone is curious, I purchased the small container which you can fill for $7.99. Sixty red blocks filled up half the container which allowed us to get some fun extras to play with.
Sorry guys, I will not be sharing a template for this project. But if you wanted to make something similar, I think it might be fun to use an actual photo. Another idea would be to place a standard valentine card between the blocks.
Thursday, January 12, 2012
Kid Craft: Doll Napkins & Placemats
 Ever since my daughter received a Madame Alexander doll for her birthday, there have been many tea parties around here. But I realized the place setting was missing something, napkins. We couldn't have that, what would Emily Post say?! So I got out some leftover party napkins and made a mini set with them. I love that the doll now has miniature napkins just like my daughter's. It makes me want to design a doll themed birthday party. I can picture it now one table for the girls and another for the dolls. . . Oh yes, the wheels are turning.
Since this craft is for kids, I made the napkins and placemats with paper. You could easily covert this into a simple sewing craft as well.
Mini Napkin Instructions
1. Take one cocktail napkin and unfold.
2. Cut into four squares along folds.
3. Refold each square into quarters. Trim down if necessary.
Mini Placemat Instructions
1. Cut a piece of scrapbook paper into a 4" x 6" rectangle.
2. Trim with decorative edged scissors. Done!

Have a tea party.
Tuesday, January 10, 2012
Cute Cookies & Packaging
 One of my favorite things to do when I'm at the Mitsuwa market is check out the cookie/candy aisle. Its true I have a sweet tooth but I'm even more interested in the packaging. It seems with every visit I stumble across something new. This time I found these adorable Moomin shaped cookies. For those not familiar with the Moomins, they are characters from a series of books and comic strips written by Tove Jansson.
 This box also caught my eye for the cookie pictured on the box. I liked how the cookie looked three-dimensional. I know cookies are already three-dimensional but this looked different. Usually a cookie is decorated with a print or frosting, not more cookie. So I had to see what they really looked like and bought a box.
 To my delight, they were even cuter in person. I fear I may never be able to go back to my basic animal crackers after seeing these.
Monday, January 9, 2012
Craft: Pinata Piggy Bank

This craft was inspired by the Pearhead wooden piggy banks. Now where the pinata part came into the mix, I'm not quite sure. I'm guessing my train of thought was this > piggy bank > smash piggy bank to open> smash pinata to open > smash pinata piggy bank to open.
This is a fun craft to use up all those shirt boxes and tissue you have lying around from the holidays. Even though this craft is easy to do, it does take up a good amount of time. I recommend spreading out the steps into three days: 1st day - construct box, 2nd day - paper mache, 3rd day- cover with tissue. You can make your bank into any shape you want, get creative!
Supplies:
Cardboard - I used one large shirt box top
Colored Tissue
Glue stick
Masking Tape
Newspaper
Paper mache paste
White paint - optional
 To make the cupcake bank, make two identical cupcake shaped pieces out of the cardboard. I recommend making a template with paper first. Next, cut 2 inch wide strips that could wrap around the entire sides of the cupcakes to form a box. It's important that your bank can stand on its own so your base needs to be proportional to the size of your bank.
 Construct bank with cardboard and tape. Don't worry if it looks messy, this will all be covered up anyway. Cut a hole on top of the box to place money in.
 Paper mache box to make it sturdy. You don't want it breaking open on its own. When dry, paint box white so newspaper print does not show through tissue (optional).
 Fold a strip of tissue in half and cut to make fringe (refer to picture). Do not cut all the way up to the fold.
 Starting at the bottom, layer tissue to cover entire box. Do this for all sides. You want to start from the bottom so only the fringe shows. If you start from the top, the folded part of the tissue will show instead of the fringe.
*When working with different colors, sometimes it's easier to draw out the pattern on your box.

Your pinata bank should look something like this when finished.
Sorry, I have to say this, just in case.
*Do not hang pinata bank. Do not hang pinata bank to open.
Sorry, I have to say this, just in case.
*Do not hang pinata bank. Do not hang pinata bank to open.
Thursday, January 5, 2012
At First Site: Cookieboy

Photo Credit: Cookieboy
For 2012 I've decided to introduce a new series called At First Site. I'll be sharing sites around the web that inspire me. Hopefully you'll find them inspiring too.
I'm kicking off the series with the blog cookieboy. Please don't judge the site by the banner. I promise the rest of the blog is not filled with cookies hanging off a half naked man. Instead, this blog showcases the work of cookie artist Yamatake Natsu Hilo. What made me choose this site was his unconventional approach to the basic sugar cookie and how he's pushing the envelope with his baking. I'll leave it at that and let the pictures do the talking. This site is in Japanese but can easily be translated with Google Translate.

cookies from a cookie workshop

Jewelry displayed on cookies!

Cookie Cafe Display - I would love to see Amy Atlas do something like this with her dessert tables.
P.S. A craft tutorial is coming soon, promise. If all goes well, it should be up Monday *fingers crossed*.
Wednesday, January 4, 2012
Printables: Blog Organizer Inserts

These blog organizer printables designed by draw! pilgrim have been around for a while but I thought some of you might be interested in them. They're great for organizing and setting goals for your blog. Even if you don't have an organizer, they still can come in handy. You can keep them on a bulletin board or your desk instead as a daily reminder.
Just out of curiosity, do you like to keep an actual organizer or do you use your computer/smart phone? I personally like to use an actual organizer to hold all my appointments and notes. However, I've been trying to keep more of it on the computer (ex. google calendar). This might sound strange but I feel like I can access/see it better when it's written down on paper. Anyone else like this?
Sunday, January 1, 2012
Trying New Things
 Every year our family gathers together for a traditional Japanese New Year's Day meal. Usually my husband's grandmother prepares the food but this year we all contributed. I volunteered to make the Ozoni soup. It was my first attempt at making the dish. I think it came out pretty good and everyone seemed to like it.
 If anyone is interested, I used the recipe from this YouTube video: How to Make Ozoni Soup.
 Don't laugh, I also tried a new hair-do for 2012, the Messy Bun. I'm officially declaring 2012 the year of the messy bun (for me that is, you can have any hair-do you want). I've decided this is going to replace that sad pony tale I've been rocking all these years.
Front view of messy bun.
Those are my diva sunglasses by the way. They're ridiculously huge but I wear them anyway.
Have any plans for trying/learning something new in 2012? It doesn't have to be anything big; it could just be a recipe or a hair-do.
Subscribe to:
Posts (Atom)
